By Diego Berrocal
Have you always wanted to take an outdoor stroll through nature and experience a memorable journey, but struggled with the bitter temperatures of winter? These two recipes will put your imagination to work as you trek from the cold isolation of a “black forest” to a playful reunion with “snow-friends.” If you’re feeling nervous about our journey, don’t worry! You won’t need too many ingredients for this adventure, so invite your family members to walk with you through these recipes that celebrate winter.
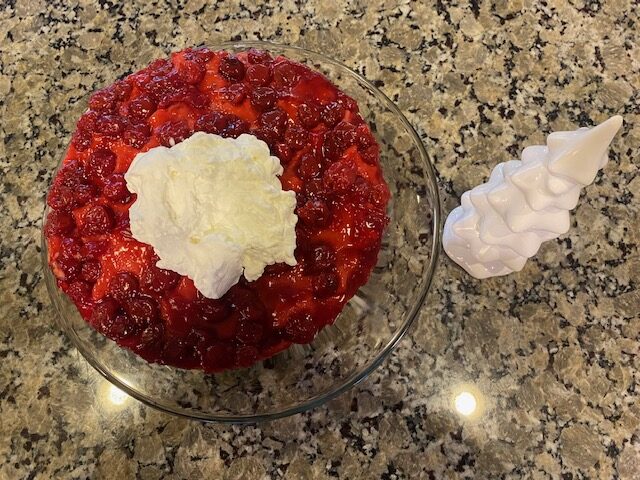
Turn your winter worries upside-down and experience a taste of nature indoors this season with a Black Forest Upside-Down Cake! Featuring a delicate devil’s food cake layer and a refreshing cherry coating, this black forest cake has the perfect blend of crisp and revivifying ingredients for you to enjoy.
For our first footfall in the black forest, gather 21 ounces of cherries for our can of cherry pie filling, which you can derive from the cherry trees available for picking.
Next, take a detour toward the fields lining the black forest, and acquire some milk and cream from the cows. These ingredients will make up one package of cream cheese that is necessary for our recipe.
Once you’ve made your way back to the forest, take a hike up sugar mountain and collect ¾ cup of sugar on your way down. We’ll need to hold onto this ingredient for later!
During your wanderings down the forest path, stop by the mill alongside the river. Ask the miller if he would be kind enough to give you two tablespoons of flour to help make your recipe. Don’t mill-about too long or you might risk slipping into the river!
There are only a few more ingredients needed on our journey, and we’ll have to be careful with this next one. In the depths of the forest, the witches gather precious items—like vanilla extract—which they stir in their bubbling cauldrons. Trade them some cherries for one teaspoon of vanilla extract. Heed the witches’ advice and be sparing with the ingredient, as it’s a costly commodity!
We’re almost near the end. Take a break, absorb the scenery, and inhale the winter air.
Now, on the outskirts of the forest, there is a farm with a few chickens and hens roaming around. Collect two large eggs and store them safely before returning to your walk; we don’t want them to break!
Our next stop is far away. Look for smoke emanating from the bakery, where the baker should be waiting for you. Ask in a hushed whisper for his most sinister food cake mix. No, you don’t want the triple chocolate fudge, nor the decadent supreme chocolate molten lava cake—that’s nothing but silly fancies and child’s play. What you need is something more wicked.
The baker may stumble back, peer around the bakery, and inquire if this secret ingredient is really what you would like. Assure him that it is so. He’ll retire inside and return, slip you one package of devil’s food cake mix through the door slit, shout to never return, and lock the bakery door. But no worries. You’ve done your part for the recipe, and he’s done his. It’s just business—plain and simple.
The final ingredient should prove a good deal more angelic than the cake mix we’ve just acquired. Heaps of whipped cream can be found along tree branches and bushes. Gather enough of it as you see fit, as this part of the recipe is up to you!
Congratulations! You’ve made it out of the forest and amassed all the required ingredients for this recipe. Enjoy the fruits of your labor!

Ingredients:
1 can (21 ounces) cherry pie filling
1 package (8 ounces) cream cheese, softened
3/4 cup sugar
2 tablespoons all-purpose flour
1 teaspoon vanilla extract
2 large eggs, room temperature
1 package devil’s food cake mix
Whipped cream (as desired)
Directions:
Preheat your oven to 350 degrees. Spoon your newly gathered cherry pie filling into a greased 12-inch cast-iron or ovenproof skillet or mold.
In a large bowl, beat your one package of cream cheese from the field, the ¾ cup of sugar from the mountain, the two tablespoons of flour from the miller, and your one teaspoon of vanilla extract from the witches until blended.
Gently beat in your two large eggs (which you have the chickens to thank for). Make sure the mixture is smooth rather than clumpy. Once ready, pour the mixture from the large bowl over the pie filling.
Prepare the devil’s food cake mix according to the package directions the baker wrote for you. Spoon this cake mixture over the cream cheese layer.
Bake in the oven for 45 minutes and keep watch over the cake. Test if the cake is ready by sticking a toothpick in the center of the cake and making sure it is clean on removal. Let the cake cool for 10 minutes before inverting it onto a serving plate. If necessary, spoon extra cherries (gathered from the cherry trees) over the cake. Layer with fresh whipped cream collected from the bushes and tree branches!
[Basic recipe courtesy of Taste of Home: https://www.tasteofhome.com/recipes/black-forest-upside-down-cake/]
Marshmallow Snow-friends
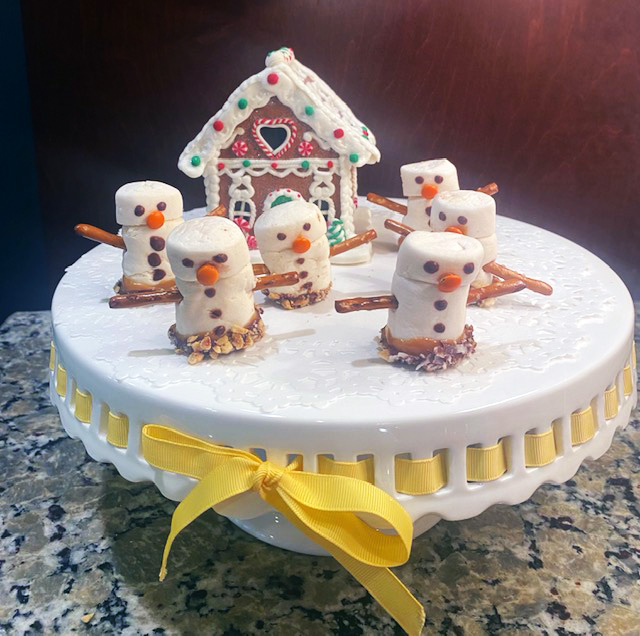
Now that you’ve made it out of the black forest, you should arrange to spend time with your snow-friends outside! Reunite with loved ones and find sanctuary. What better way is there to find comfort from the cold than sharing your time with others?
Skate around the frozen lake and don’t forget to wave at your companions as you whiz by. If you get thirsty, have a cup of hot cocoa with one of your snow-friends, and ask how their winter has been! Or, if you’re in a playful mood, try challenging them to a snowball fight. It’ll be hard to see your new snow-friends amid all the falling snow, but that’s part of the game!
By now, you might be quite chilly from running in the cold. Feel free to ask one of your snow-friends if they would be willing to invite you into their home. How nice to keep warm and get to know one another in a communal setting during these frosty months!
Gather your family and friends and sled down a snow-covered hill. I’m sure one of your snow-friends would be more than happy to accompany you on your way down—it is their native environment after all!
Don’t forget to have a laugh with your snow-friends after you’re done sledding; nothing heals a chilled, icy heart like laughter with the ones you love most.

Ingredients:
12 chewy caramels, unwrapped
3 tablespoons sweetened condensed milk
2 tablespoons butter
1 package (10-ounces) large marshmallows (about 39)
Marshmallow creme (optional)
53 pretzel sticks
1 cup toasted coconut, chopped peanuts, walnut pieces, or your choice of favorite nuts
4 ounces bittersweet, semisweet, or milk chocolate pieces
2 teaspoons shortening
Orange mini-M&M’s
Directions:
For the first step in forming your family of snow-friends, line a large baking sheet with foil. Apply butter to the foil. Set the baking sheet and foil aside.
In a small saucepan, mix the 12 chewy caramels, three tablespoons of sweetened condensed milk, and two tablespoons of butter. Heat and stir over medium-low heat until mixture is melted.
Using kitchen scissors, cut one-third of the marshmallows in half crosswise. Place each marshmallow half, sticky side down, on top of a whole marshmallow. Press together gently. If needed, spread a small amount of marshmallow creme between the marshmallow pieces to hold them together. For arms, place a pretzel stick into two opposite sides of each whole marshmallow. This should form the body of your marshmallow friends!
Dip the bottom third of each of the marshmallow stacks into the melted caramel mixture. We don’t want our marshmallow snow-friends to slip and fall in the snow! Allow the excess caramel to drip off and place your dipped marshmallow friends on the prepared baking sheet.
Situate one cup of chopped peanuts, coconut flakes, and walnut pieces in separate small bowls. In a second small saucepan, combine four ounces of chocolate and two teaspoons of shortening. Heat and stir chocolate mixture over low heat until smooth.
Dip each caramel-coated marshmallow stack in melted chocolate to give your friends a bath—covering the bottom of each stack with chocolate. Allow any excess to drip off (just like before), so your snow-friends can cool off! Immediately dip chocolate-covered marshmallow stacks in chopped peanuts, coconut flakes, and walnut pieces. Return your little marshmallow friends to the baking sheet. Let them stand and relax for about 30 minutes, or until chocolate sets.
Re-melt chocolate in saucepan over low heat, if necessary. Place your snow-friends on their backs. To make their eyes and buttons, dip one end of a remaining pretzel stick into melted chocolate and dab on chocolate eyes. For their noses, dab some chocolate and attach an orange mini-M&M.
Let them stand and stretch their limbs for about five minutes or until dry. Now you should have 26 snow-friends!
[Basic recipe courtesy of BHG Test Kitchen: https://www.bhg.com/recipe/cookies/marshmallow-snowmen/]